

A book nook is a miniature scene designed to sit between books on a shelf, creating the look of a hidden world tucked inside your library. Whether you’re building a magical alleyway, a cozy reading corner, or a fantasy town, your first book nook can be both exciting and challenging. This guide covers essential DIY tips to help beginners create a clean, stable, and visually impressive book nook from start to finish.
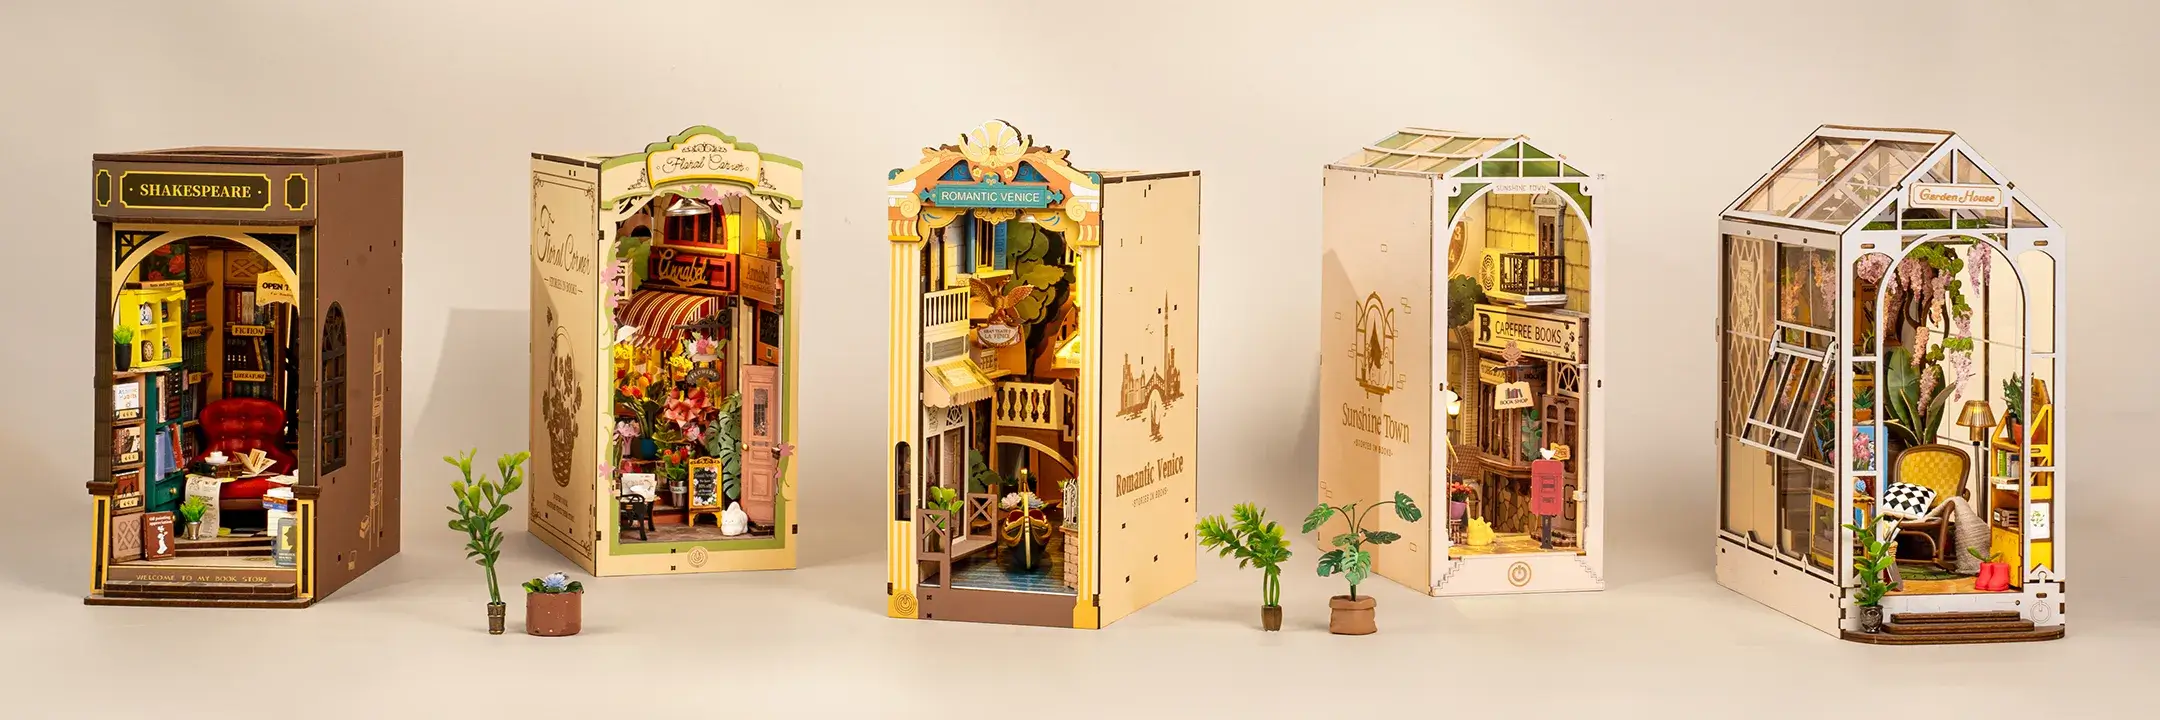
10 DIY Tips for Building Your First Book Nook
1. Start With a Clear Theme
Before gathering materials, choose a theme or scene.
Popular ideas include:
- Fantasy alleys
- Bookshops
- Mini streets
- Train platforms
- Fairytale forests
- Movie or story-inspired locations
A clear theme helps you plan your layout, materials, lighting, and accessories without confusion later.
2. Plan the Layout Before You Build
Sketch your design on paper or use simple digital tools.
Include:
- Wall placement
- Pathways or floors
- Lighting positions
- Entry viewpoint (front, side, or angled)
- Height and width based on your bookshelf
Planning ahead prevents measurement issues and saves time during assembly.
3. Choose the Right Materials

For beginners, reliable and easy-to-cut materials work best:
- Wood or MDF board for the main structure
- Foam board or cardboard for walls and floors
- Resin, clay, or plastic for mini accessories
- Printed paper for signs and wall textures
Stick to materials you’re comfortable handling, especially if it’s your first project.
4. Work in Sections
Instead of building everything at once, break your project into small sections:
- Left wall
- Right wall
- Floor
- Miniatures
- Lighting
Building in parts allows you to focus on details and prevents accidental damage during assembly.
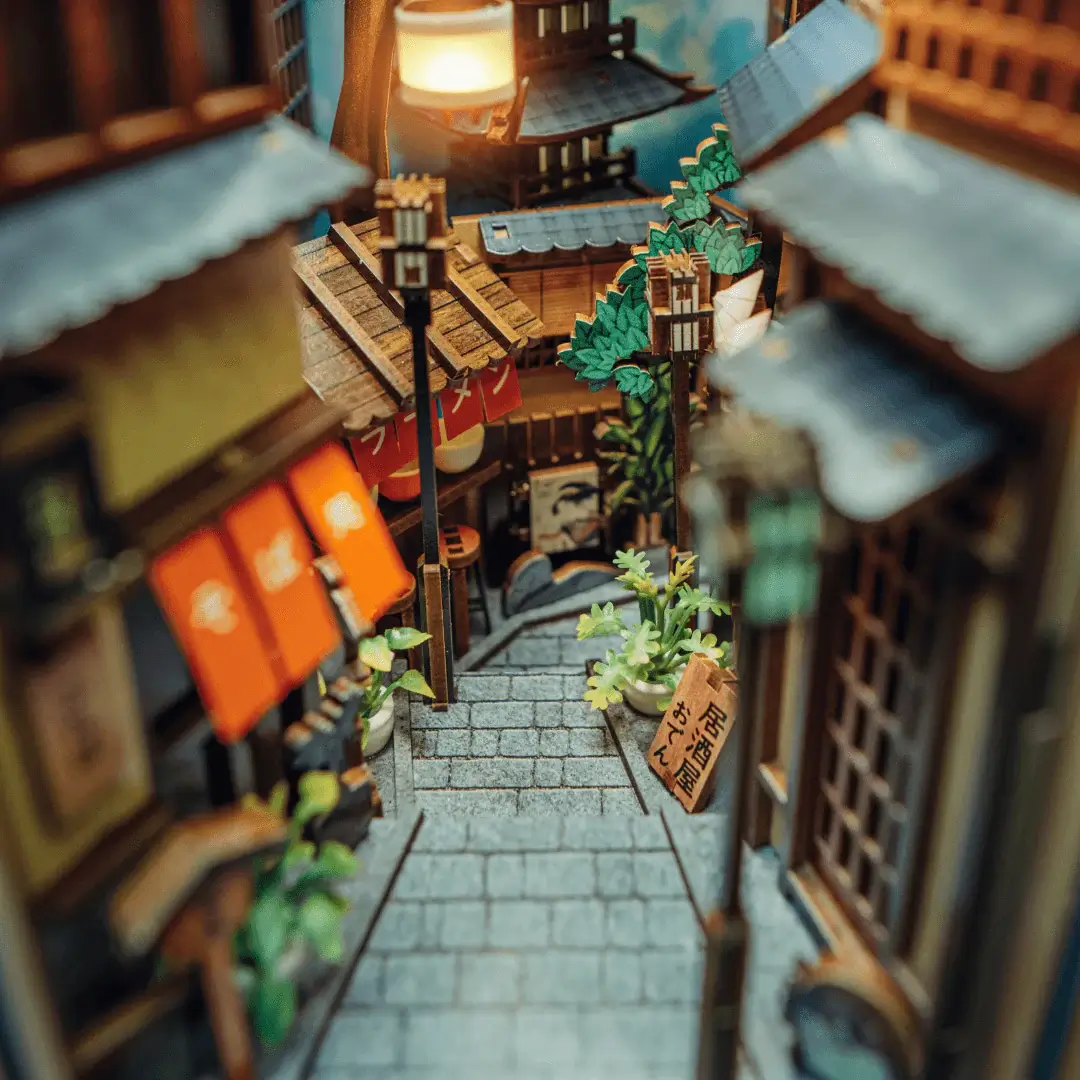
5. Add Lighting for Depth
Lighting dramatically enhances the final look. LED strips, micro-LEDs, or USB-powered lights work best because they stay cool and fit easily inside a book nook.
Consider:
- Warm lights for cozy indoor scenes
- Cool lights for sci-fi or outdoor scenes
- Hidden wiring behind walls or under floors
Always test your lighting before sealing the structure.
6. Use Printed Textures for Realistic Results
Printed brick, wood, tile, or wallpaper textures save time and give a clean, professional finish. You can print them at home or use scrapbook paper. Apply them with a smooth layer of glue to avoid wrinkles.
7. Prioritize Stability
Since a book nook sits on a shelf, the structure needs to be stable.
Reinforce corners with:
- Wooden strips
- Extra glue
- Internal supports
Make sure the frame is sturdy before adding delicate miniature pieces.
8. Keep the Scale Consistent
Choose one scale (commonly 1:24 or 1:18) and stick to it throughout the build.
Mixing sizes can make the scene look uneven, especially in alleyways or street layouts.
9. Add Miniature Details Last
Small items like signs, lanterns, shelves, and characters should be added only after the structure and lighting are complete. This prevents breakage and keeps your scene clean.
10. Test the Fit on Your Shelf
Before sealing the back panel, place the book nook between your books to ensure:
- Proper width
- Stable positioning
- Comfortable viewing angle
Making adjustments at this stage is easier than after the build is complete.
Final Thoughts
Building your first book nook is an enjoyable DIY project that combines creativity, design, and craftsmanship. With the right plan, materials, and techniques, even beginners can create a miniature scene that fits neatly on a bookshelf and becomes a unique display piece.
Whether your project is inspired by fantasy worlds or real-life streets, these tips will help you achieve a clean, sturdy, and visually appealing result.